
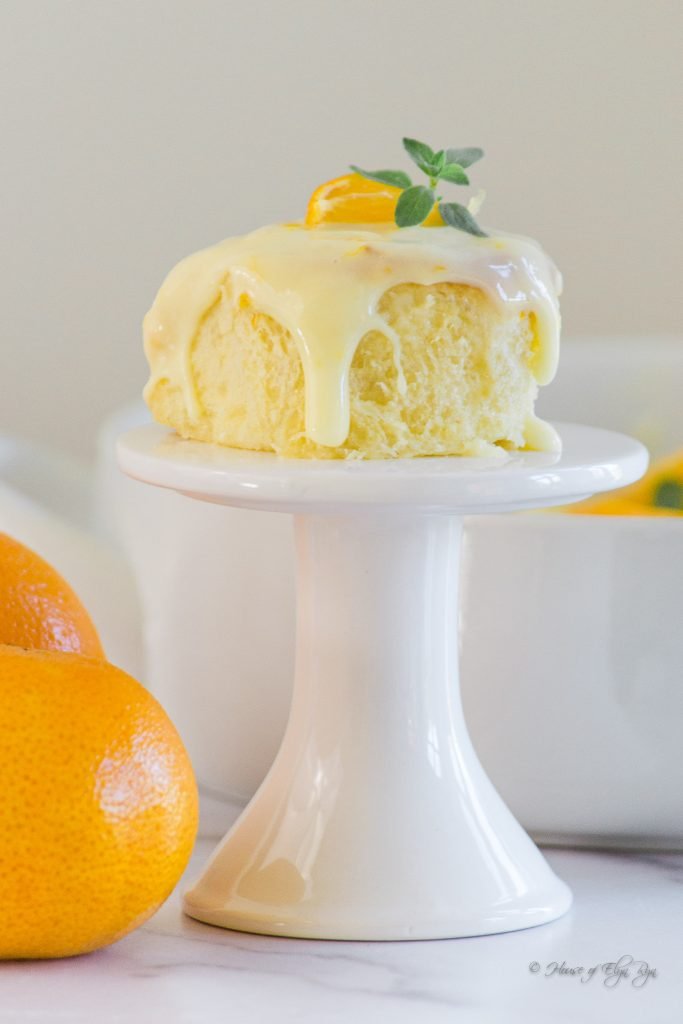
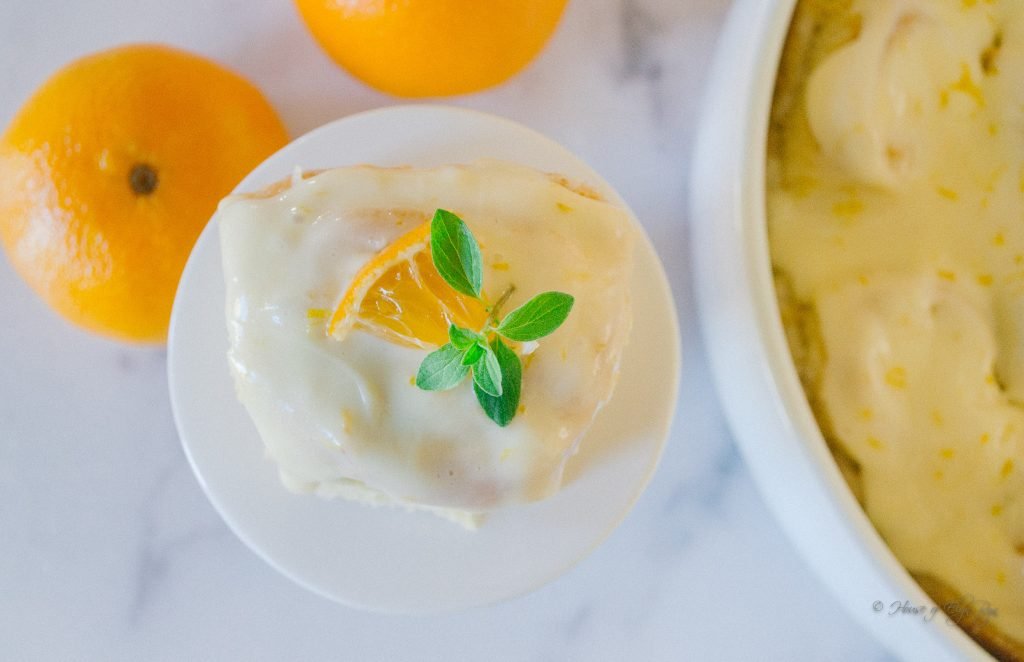
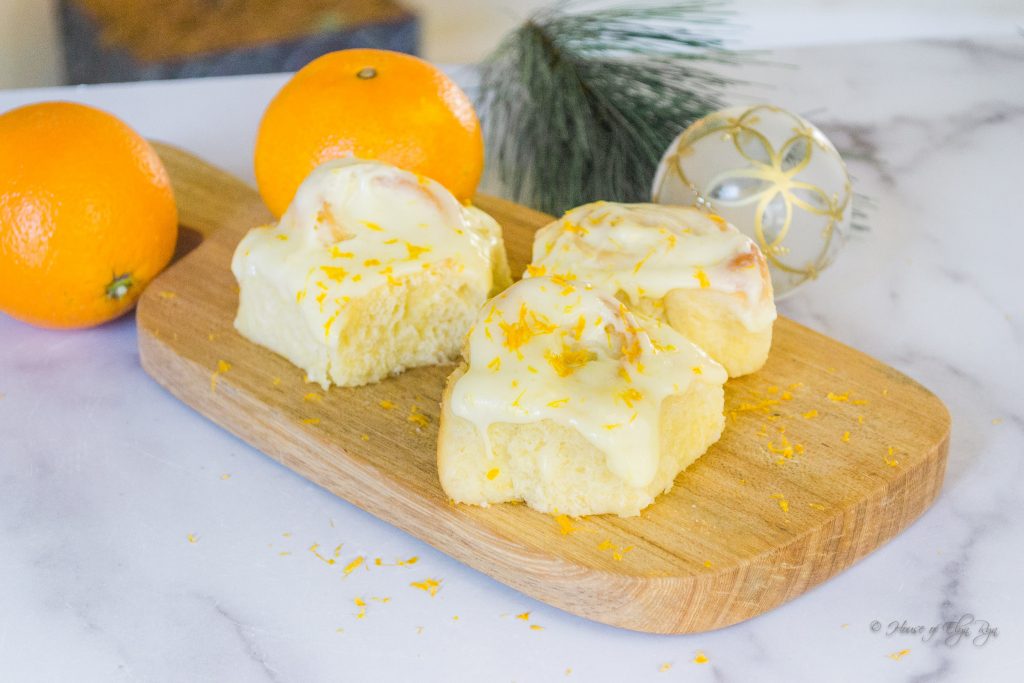
Flavorful orange rolls with fresh orange filling and cream cheese icing are perfect for breakfast or dessert. These rolls are light and fluffy and melt-in-your-mouth delicious!
Try Making Homemade Orange Rolls
If you think making homemade orange rolls are out of your reach, you might want to reconsider. For most of the preparation time, the dough will rise while you do something else. And in the end, they are so worth your time!
However, the first requirement for making tender and delicious rolls is to read and follow the instructions carefully. This will ensure that you have the dough with the correct consistency. It should pull away from the sides of the mixing bowl as you start to knead it. If you knead it by hand, it cannot be too sticky to handle.
How to Measure the Flour for Orange Rolls
- Before you measure the flour, fluff it a little with a whisk. This will keep it from packing in the measuring cup so you don’t add too much flour.
- Use a spoon to fill the measuring cup with flour. Resist scooping the flour with the measuring cup because this can pack too much flour in the cup.
- Don’t fill the measuring cup over your mixing bowl so you don’t drop extra flour into the bowl.
- Fill the measuring cup to heaping. Then run a knife over the top of the cup to level the flour so that it is exactly even with the top of the measuring cup.
- If the dough is too sticky to handle, add up to 2 additional tablespoons of flour but no more. Two tablespoons should be enough if you carefully measured the flour.
Working with Yeast
- Yeast is not just an ingredient for advanced bakers because it is easy to work with.
- This recipe calls for instant yeast which is also called rapid-rise or quick-rise yeast.
- Always use yeast before its expiration date. Old yeast may not rise.
- Opened yeast should be stored in the refrigerator in an airtight container.
- Opened yeast can also be stored in the freezer in an airtight container for several months.
- New unopened yeast should be stored in a dry cool location.
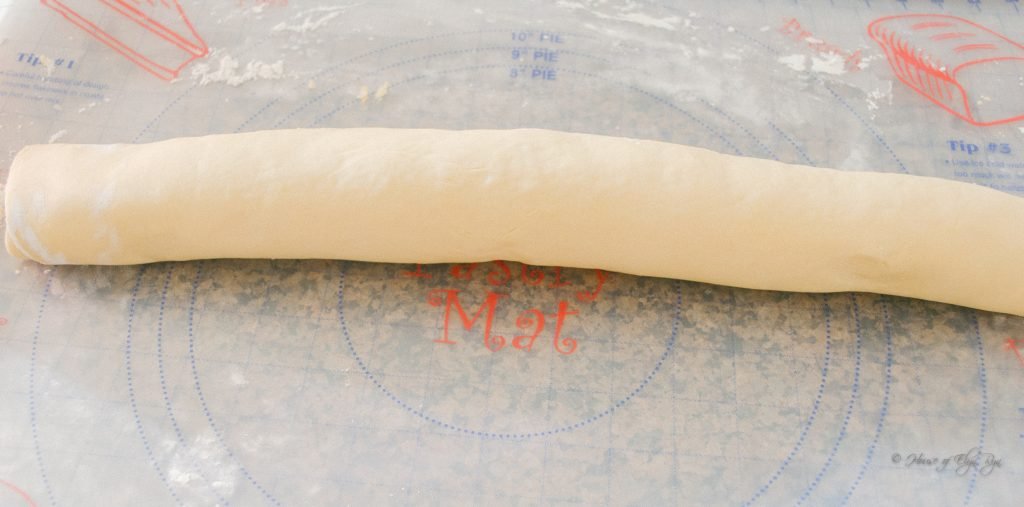
Long Edge Vs. Short Edge
To make smaller orange rolls, roll the prepared dough starting with the long edge (as shown above). Because you roll the dough into a rectangle, there is a long edge and a short edge. If you roll up the dough with the short edge, you can cut larger but fewer rolls.

Cutting the Orange Rolls
You can use a string, dental floss, or a serrated knife to cut the rolls. I think dental floss gives the cleanest cut but either method will work.
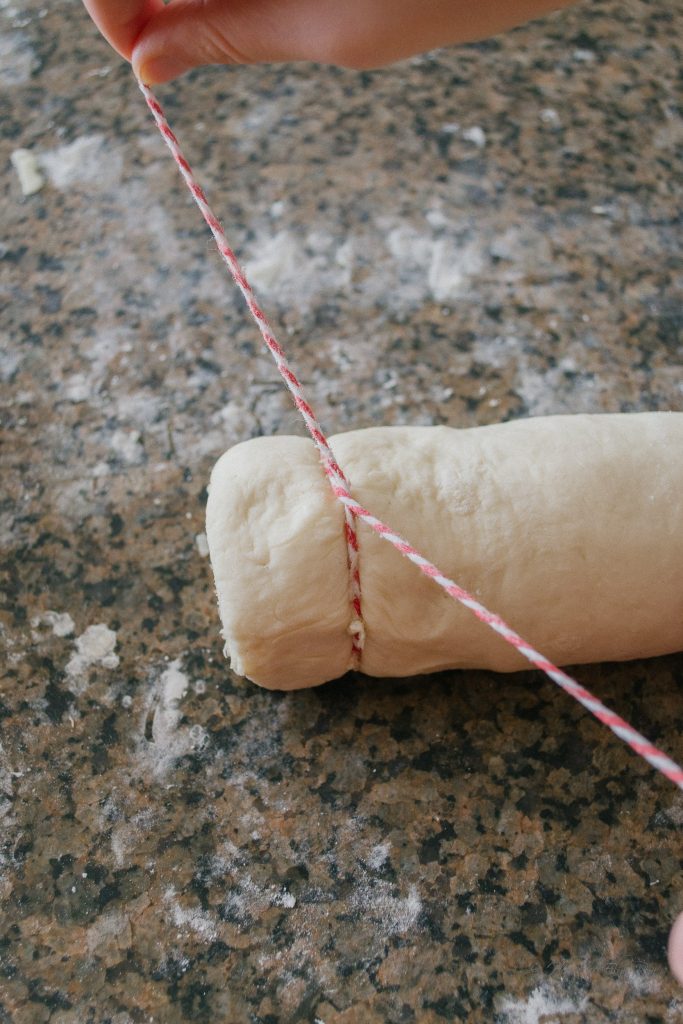
Place the string around the rolled-up dough and pull both ends of the string to cut. Cut each piece the same size. Usually, the ends of the rolled dough will not have the same amount of filling as the rest of the roll so I like to cut off the ends.
The rolls shown above were cut with dental floss and have a very clean cut.
Baking the Orange Rolls
Bake the rolls to a golden brown but don’t overbake them so that they stay very soft.
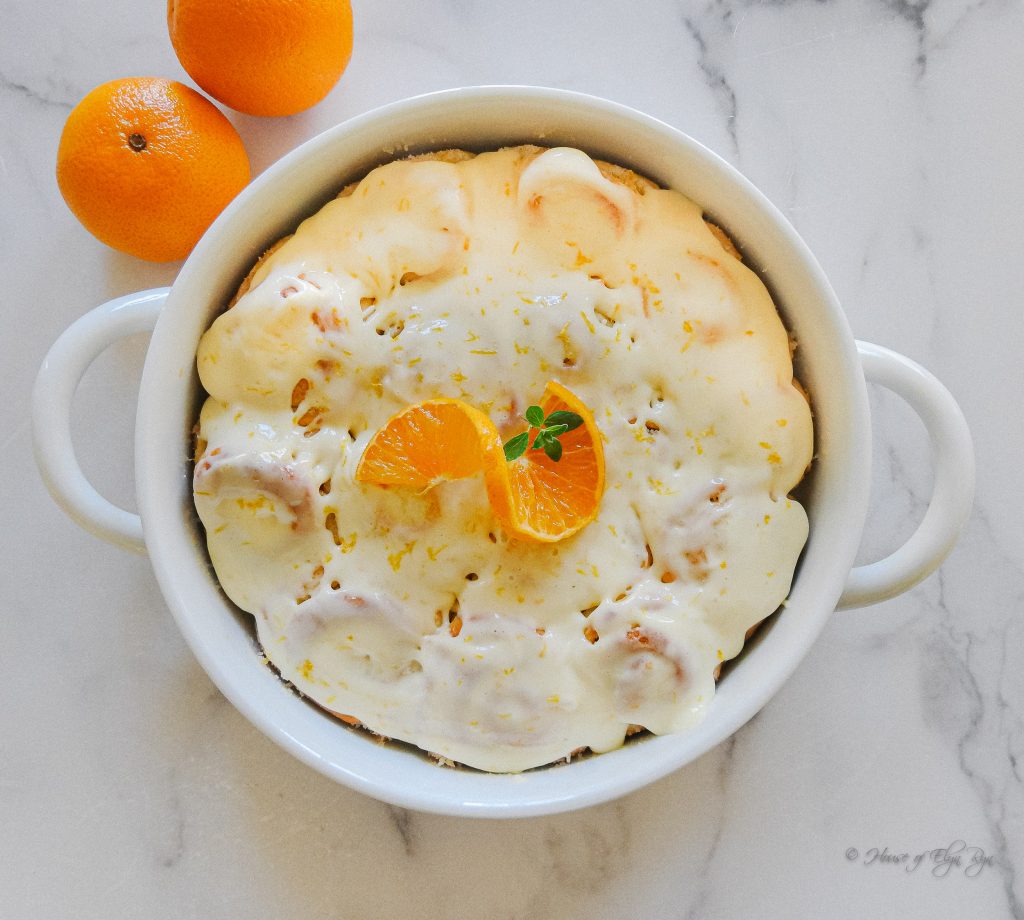
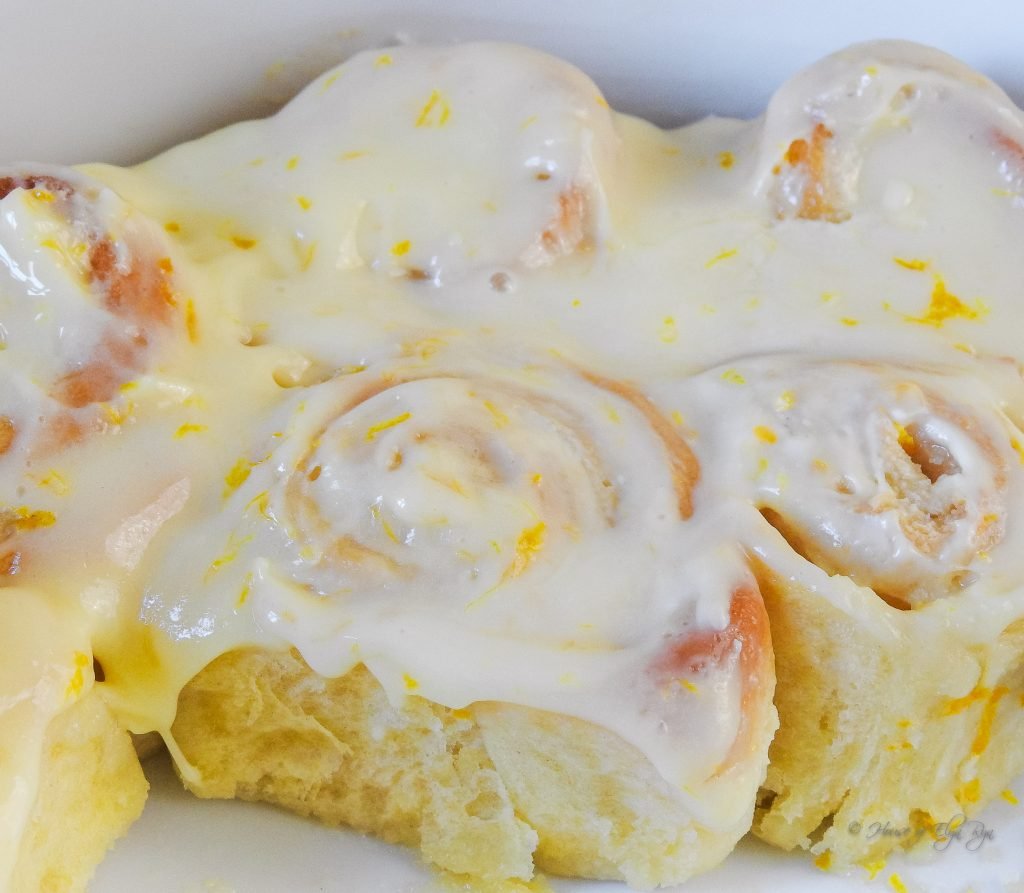
Icing the Orange Rolls
This recipe makes plenty of icing for the rolls. Use as little or as much as you like. Garnish with a slice of orange and a little extra orange zest sprinkled on.
Storing Orange Rolls
These rolls are best if eaten right after they are baked. However, they keep well in the refrigerator and can be heated for about 10-15 seconds in the microwave.
Try Other Orange Recipes
If you like orange recipes, you might also like:
- Orange Chicken Recipe
- Orange Fluff Salad
- Orange Pretzel Salad
- Blood Orange Tart
- Orange Creamsicle Cupcakes
- Orange Rolls Reimagined
- Orange Cream Tart
- Orange Winter Salad

| Prep Time | 30 minutes |
| Cook Time | 20 minutes |
| Passive Time | 2 hours 15 minutes |
| Servings |
|
- 3/4 cup warm whole milk
- 1 packet (2 1/4 teaspoons) instant yeast (see note below on yeast)
- 1/4 cup granulated sugar
- 1 large egg, room temperature
- 1 large egg yolk, room temperature
- 1/4 cup salted butter, melted
- 3 cups bread flour, carefully measured
- 3/4 teaspoon salt
- Extra bread flour
- 1/2 cup salted butter, softened
- 1 cup granulated sugar
- 2 teaspoons bread flour
- Zest of a medium-sized orange
- 4 ounces cream cheese, room temperature
- 2 tablespoons salted butter, softened
- Zest of a medium-sized orange
- 1/2 teaspoon vanilla extract
- 1/8 teaspoon almond extract
- 3 tablespoons fresh orange juice
- 1 1/4 cups confectioners' sugar
Ingredients
Rolls
Filling
Orange Cream Cheese Icing
|
|
-
In a microwave bowl, heat the milk for 45 seconds on high to 105-110 degrees F. A drop of milk at this temperature will feel very warm on the inside of your wrist. Or check with a food thermometer. Pour the milk into a mixing bowl and sprinkle on the yeast. (See "Proofing the Yeast" note below.)
-
Then add the sugar, eggs, and butter. Whisk together. Then add the flour and salt and stir until a stiff dough forms.
-
Using a dough hook, knead for 7 to 8 minutes. The dough should pull away from the bowl as it kneads. If the dough is too sticky and sticks to the bowl, add 1-2 tablespoons of flour and continue kneading.
-
After kneading, move the dough to a well-oiled bowl and cover with plastic. Let rise for 1½ hours or until doubled in size.
-
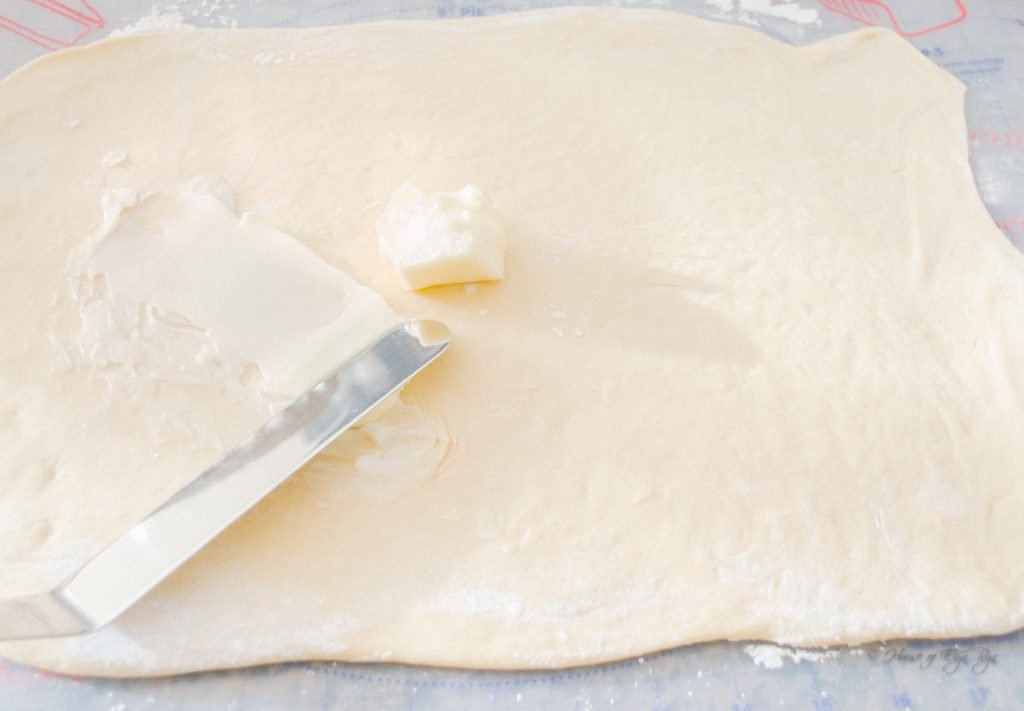
Turn the dough out onto a floured surface. Roll into a rectangular size approximately 16 x 10 inches.
-
Spread the butter onto the dough.
-
Whisk together the sugar, flour, and orange zest and sprinkle over the butter.
-
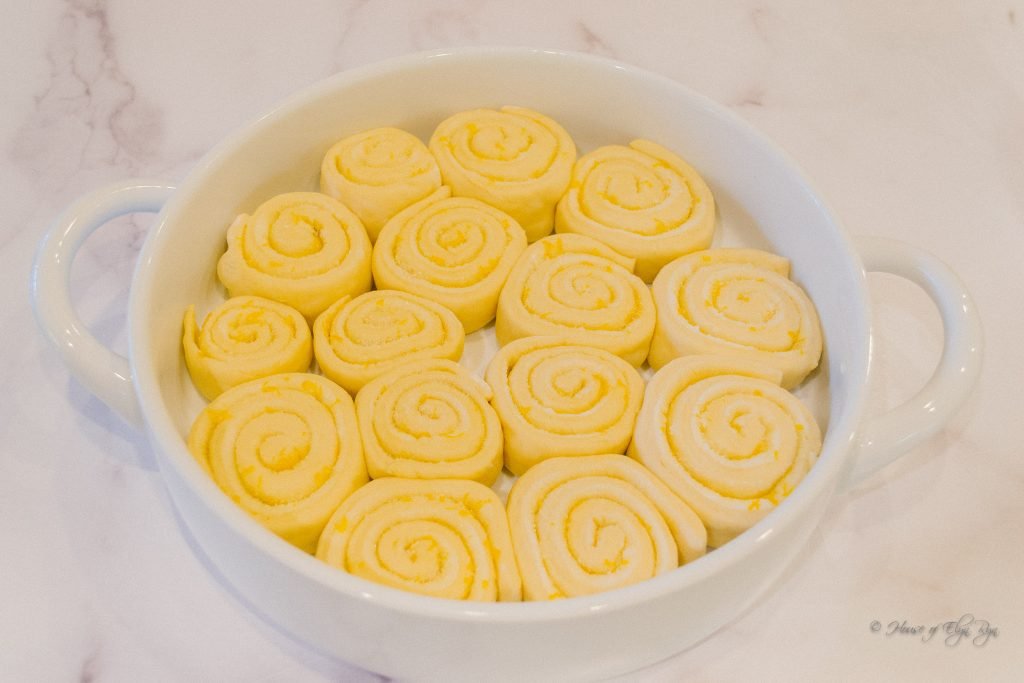
Carefully roll up the 16-inch side of the dough into a tight roll. Then use a string or dental floss to cut off the uneven ends of the roll. (If any sugar falls out of the rolls when you cut them, tuck it back in as well as you can.) Then cut 15 evenly-sized pieces and place them in an 11-inch round pan or equivalent size. Do not tightly pack the rolls so they have room to rise.
-
Cover with plastic and let rise in a warm place for 45 minutes.
-
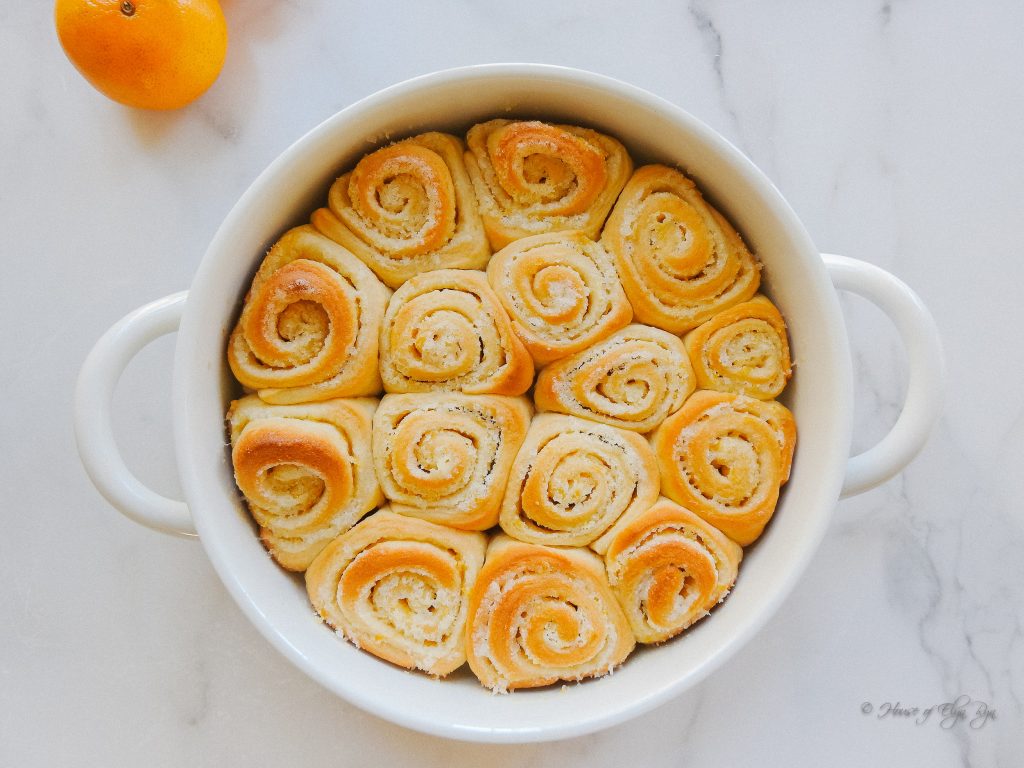
Preheat oven to 350 degrees F and bake uncovered buns for 20-25 minutes or until lightly browned and no longer doughy in the center. (Because oven temperatures vary, you may need to bake them up to 35 minutes.) Let the rolls cool for a few minutes before adding the icing.
-
In a mixing bowl beat the cream cheese and butter together. Add the orange zest, extracts, and orange juice. Mix together.
-
Then add the sugar and beat well. Spread icing onto the rolls.
Proofing the Yeast
You do not have to proof instant yeast because it can lose some of its rapid-rising power if exposed to liquids too long. However, if you are uncertain if your instant yeast is fresh, do a test anyway. After adding the warm milk to the yeast in the first step, wait for 5-10 before continuing to make sure the yeast is not too old. The yeast should be bubbly or foamy after a few minutes if it is fresh. As soon as you determine that it will rise (because it is forming tiny bubbles), continue with step 2.
Kneading
The dough can be kneaded by hand for 8 minutes in place of a mixer.
Rising
Place a towel in the dryer and heat for about 5 minutes. Then place the warm towel over the covered dough to help it rise.
Orange Zest
The quickest and easiest way to grate the orange skin (zest) is with a Microplane or other fine grater.
Making the Rolls Ahead of Time
To make rolls the day before: Cut the rolls and place them in a pan but do not let them rise. Cover and place them in the refrigerator. The next day, remove them from the refrigerator and let them sit out for 1½ - 3 hours to come to room temperature and double in size. Then uncover and bake.
Troubleshooting
There are usually only a few reasons your rolls don't rise:
- The yeast is old. (Sometimes it is old when you buy it.) Store opened yeast in the refrigerator to help extend its life.
- The milk was too hot, which killed the yeast. Use a cooking thermometer to get the temperature right. Different yeasts have different temperatures that will kill them. By 120 degrees F, all bread yeasts can start to die, and 140 degrees F is the point where none of the yeast can survive.
- The milk was too cool. Cool milk does not kill yeast, but it might cause the rolls to need a much longer rise time.
- Your room was too cold for the rolls to properly rise. Bakers have success placing the dough in different places. I have found that a constant warm temperature works best.
Ideas for keeping the rising dough warm:
- Try placing the covered dough bowl in a sunny spot, letting the sunlight hit it.
- Set it on top of a refrigerator.
- Set it on a heating pad on low heat. Place a towel between the dough bowl and the heating pad--so the heating pad doesn't overheat and cook the dough.
- Place it near a radiator or other heat source.
- Place it in a 170 degrees preheated oven. Preheat the oven to warm it (not hot), and then turn it off. Wrap the top of the dough bowl with plastic wrap and place it inside.
- Place the covered dough bowl under a reading lamp.