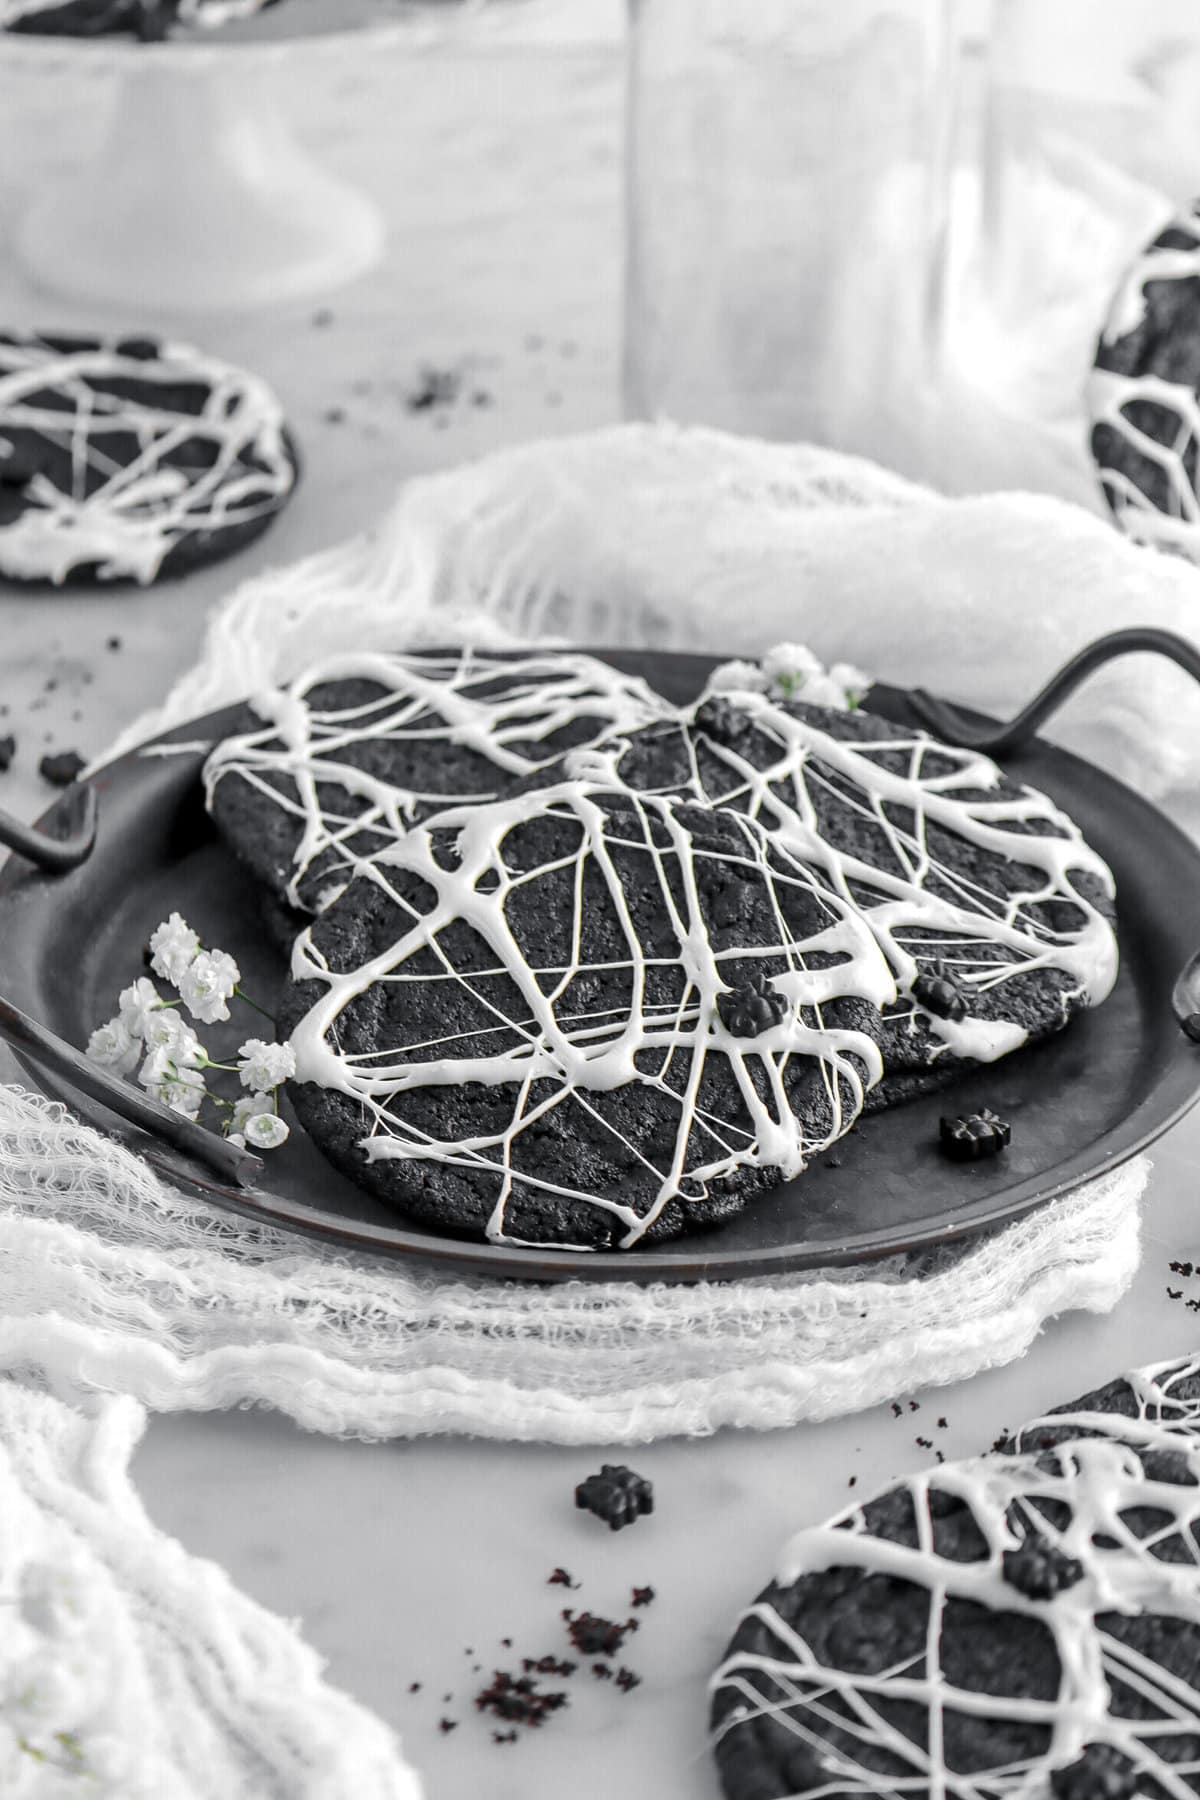
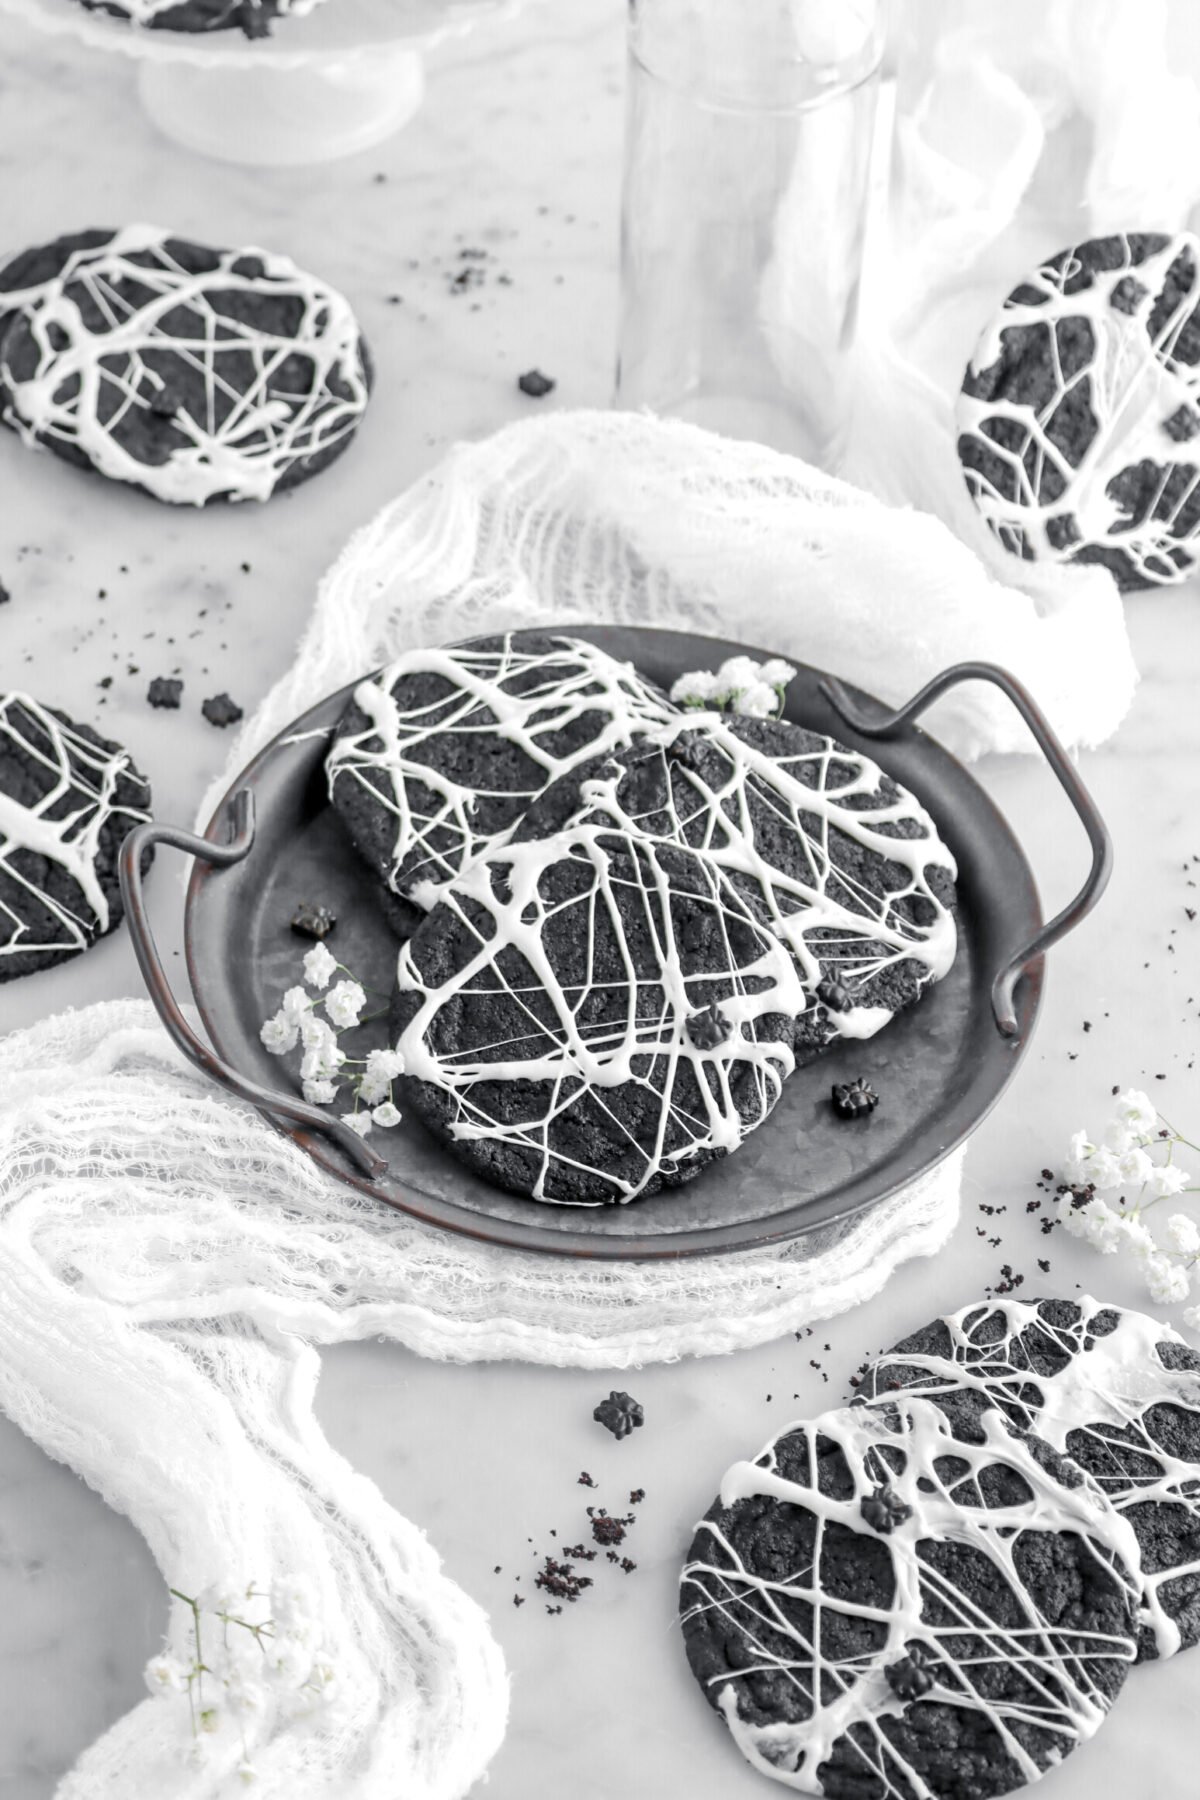
Creepy Crawly Spider-Web Cookies

This post may contain affiliate links, please visit our privacy policy for details.
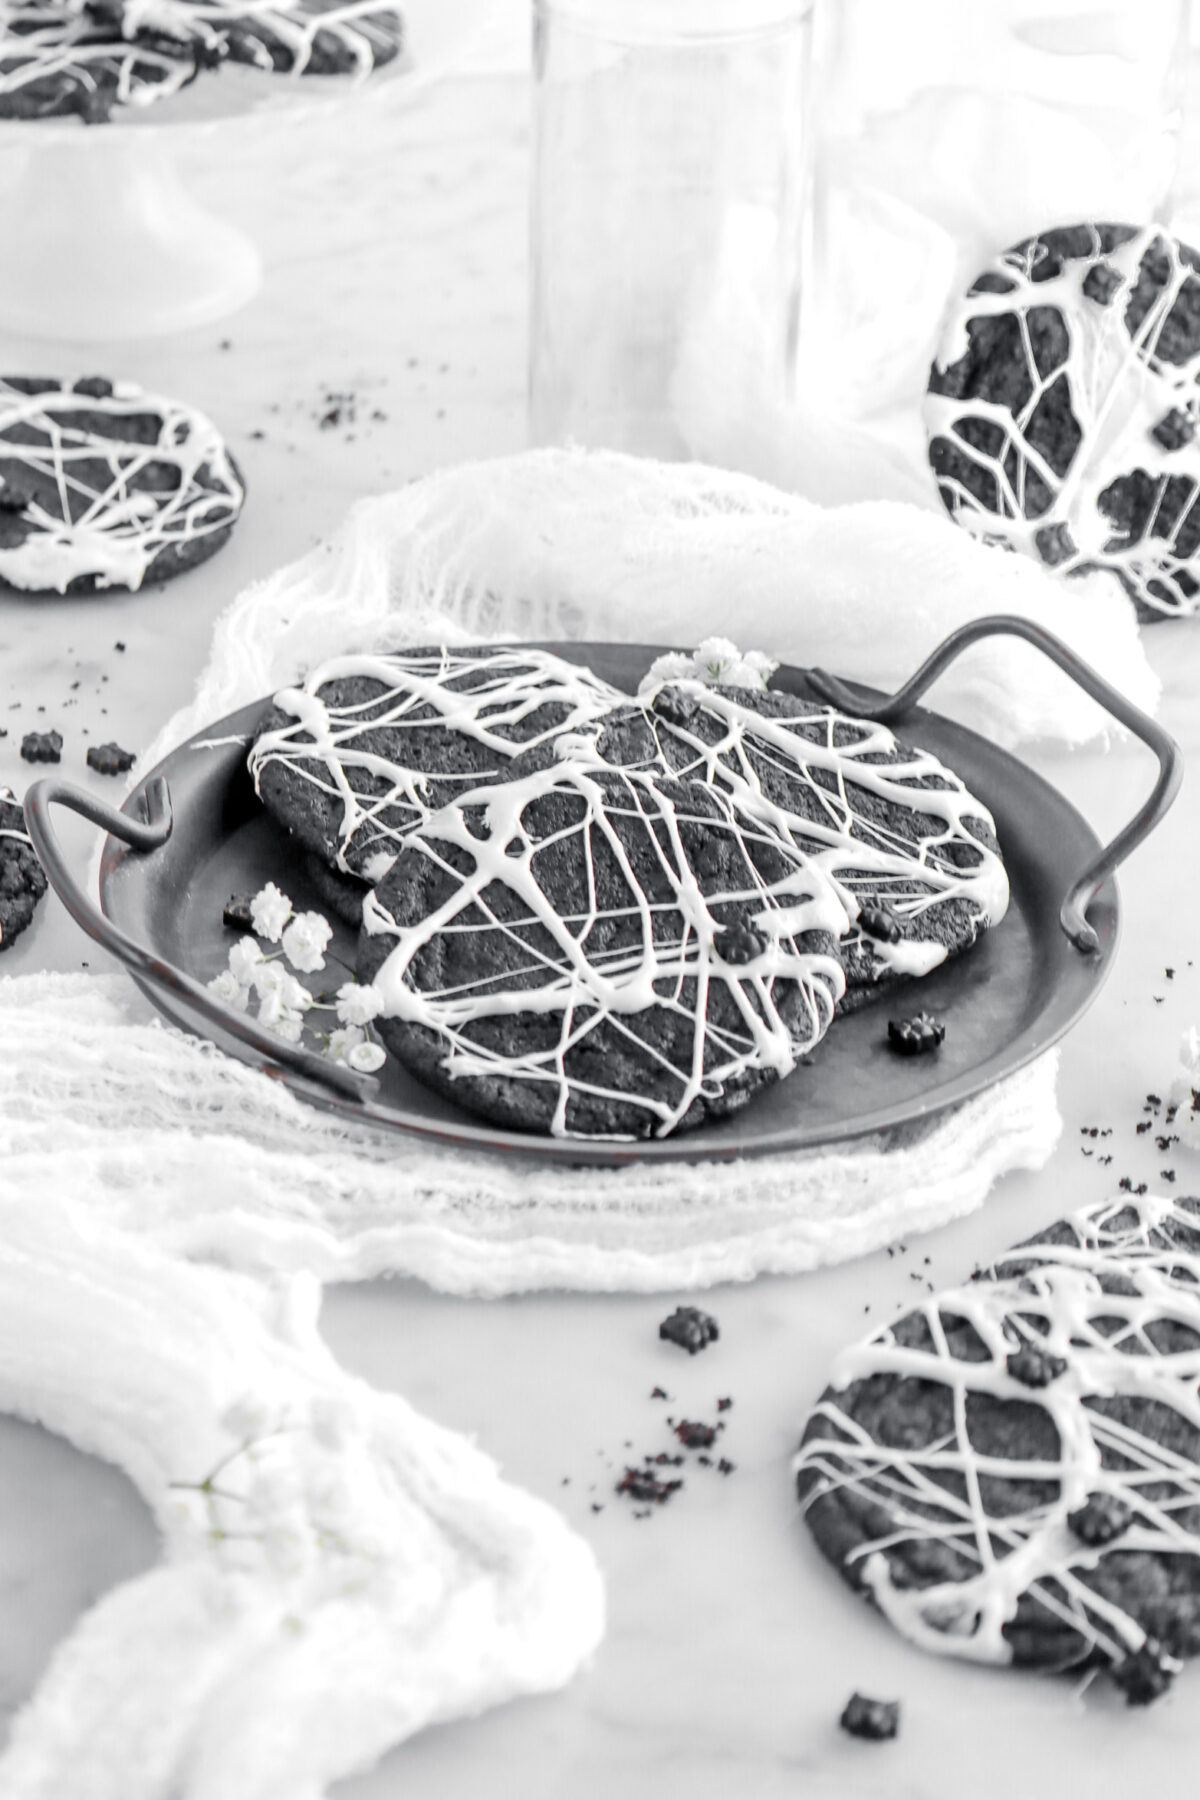
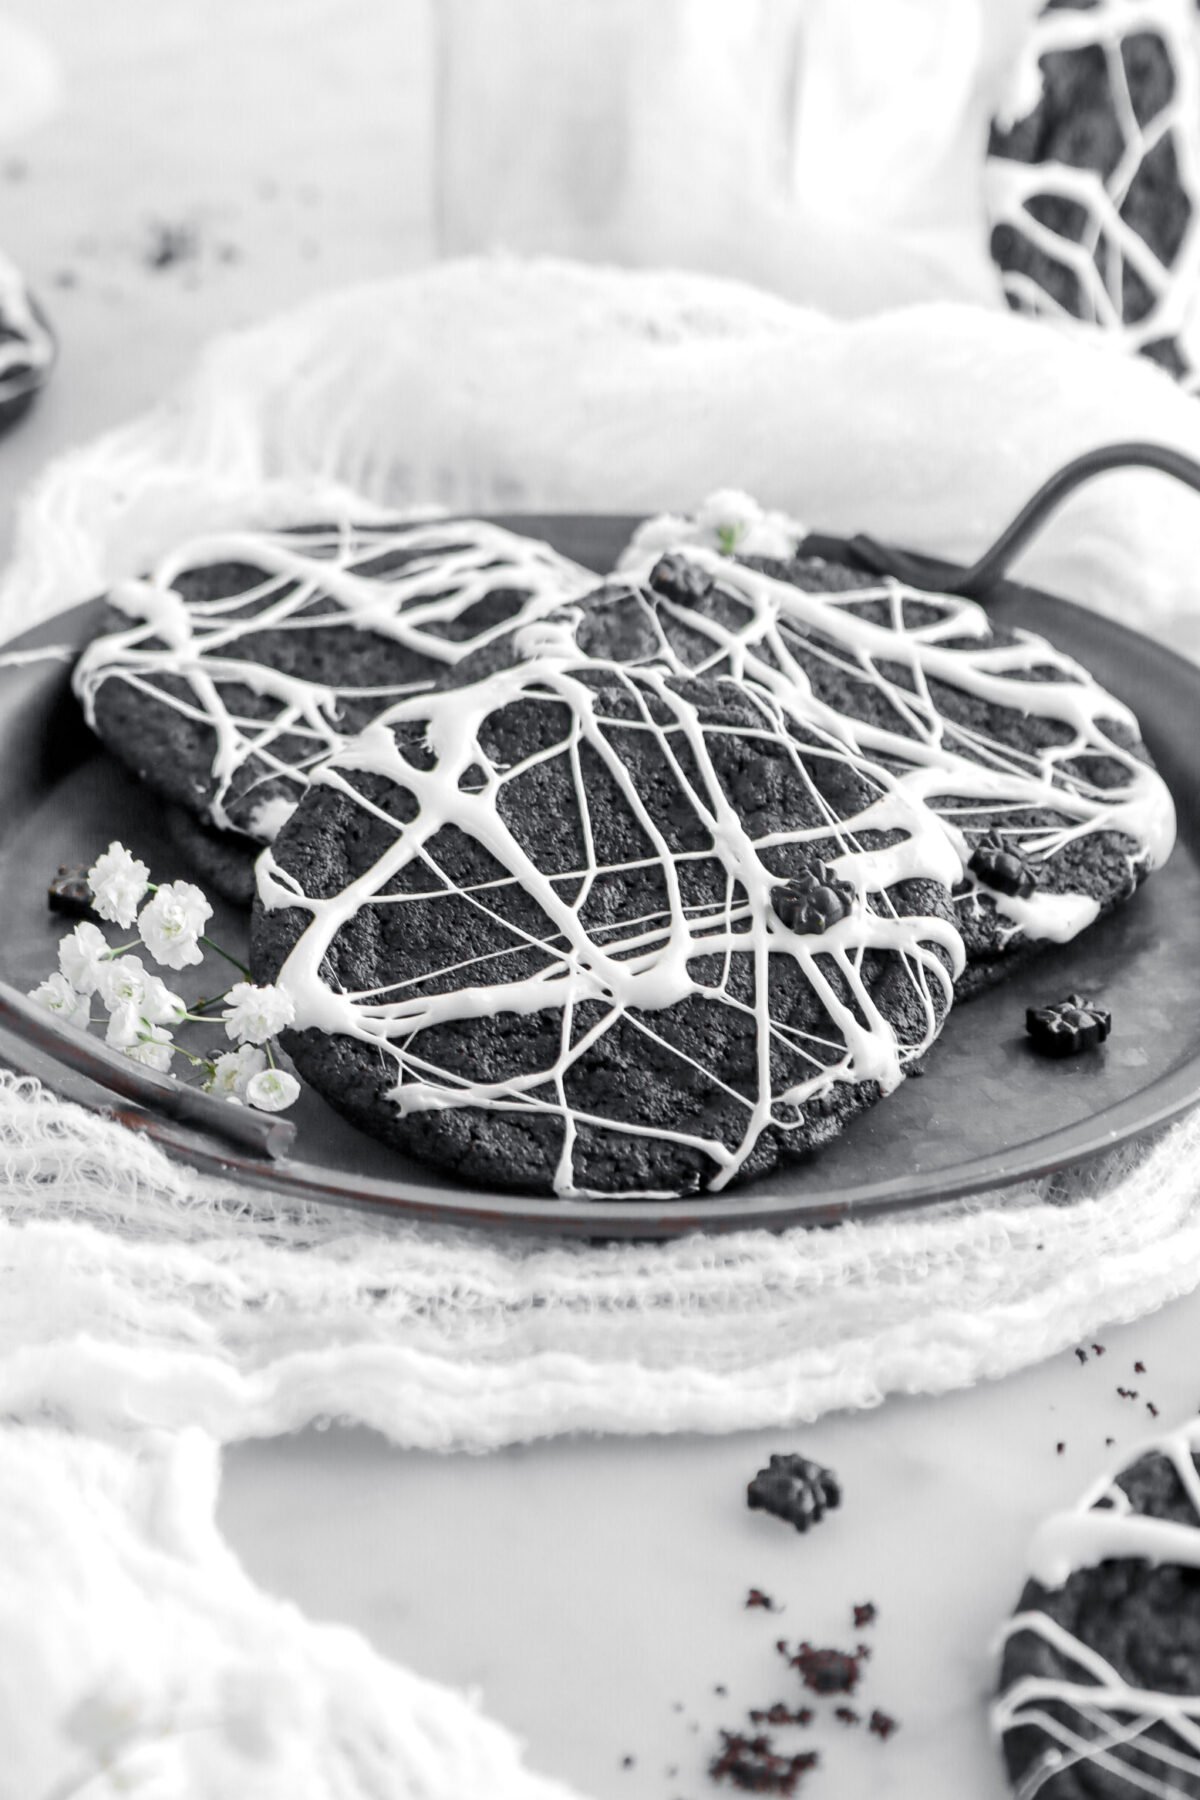
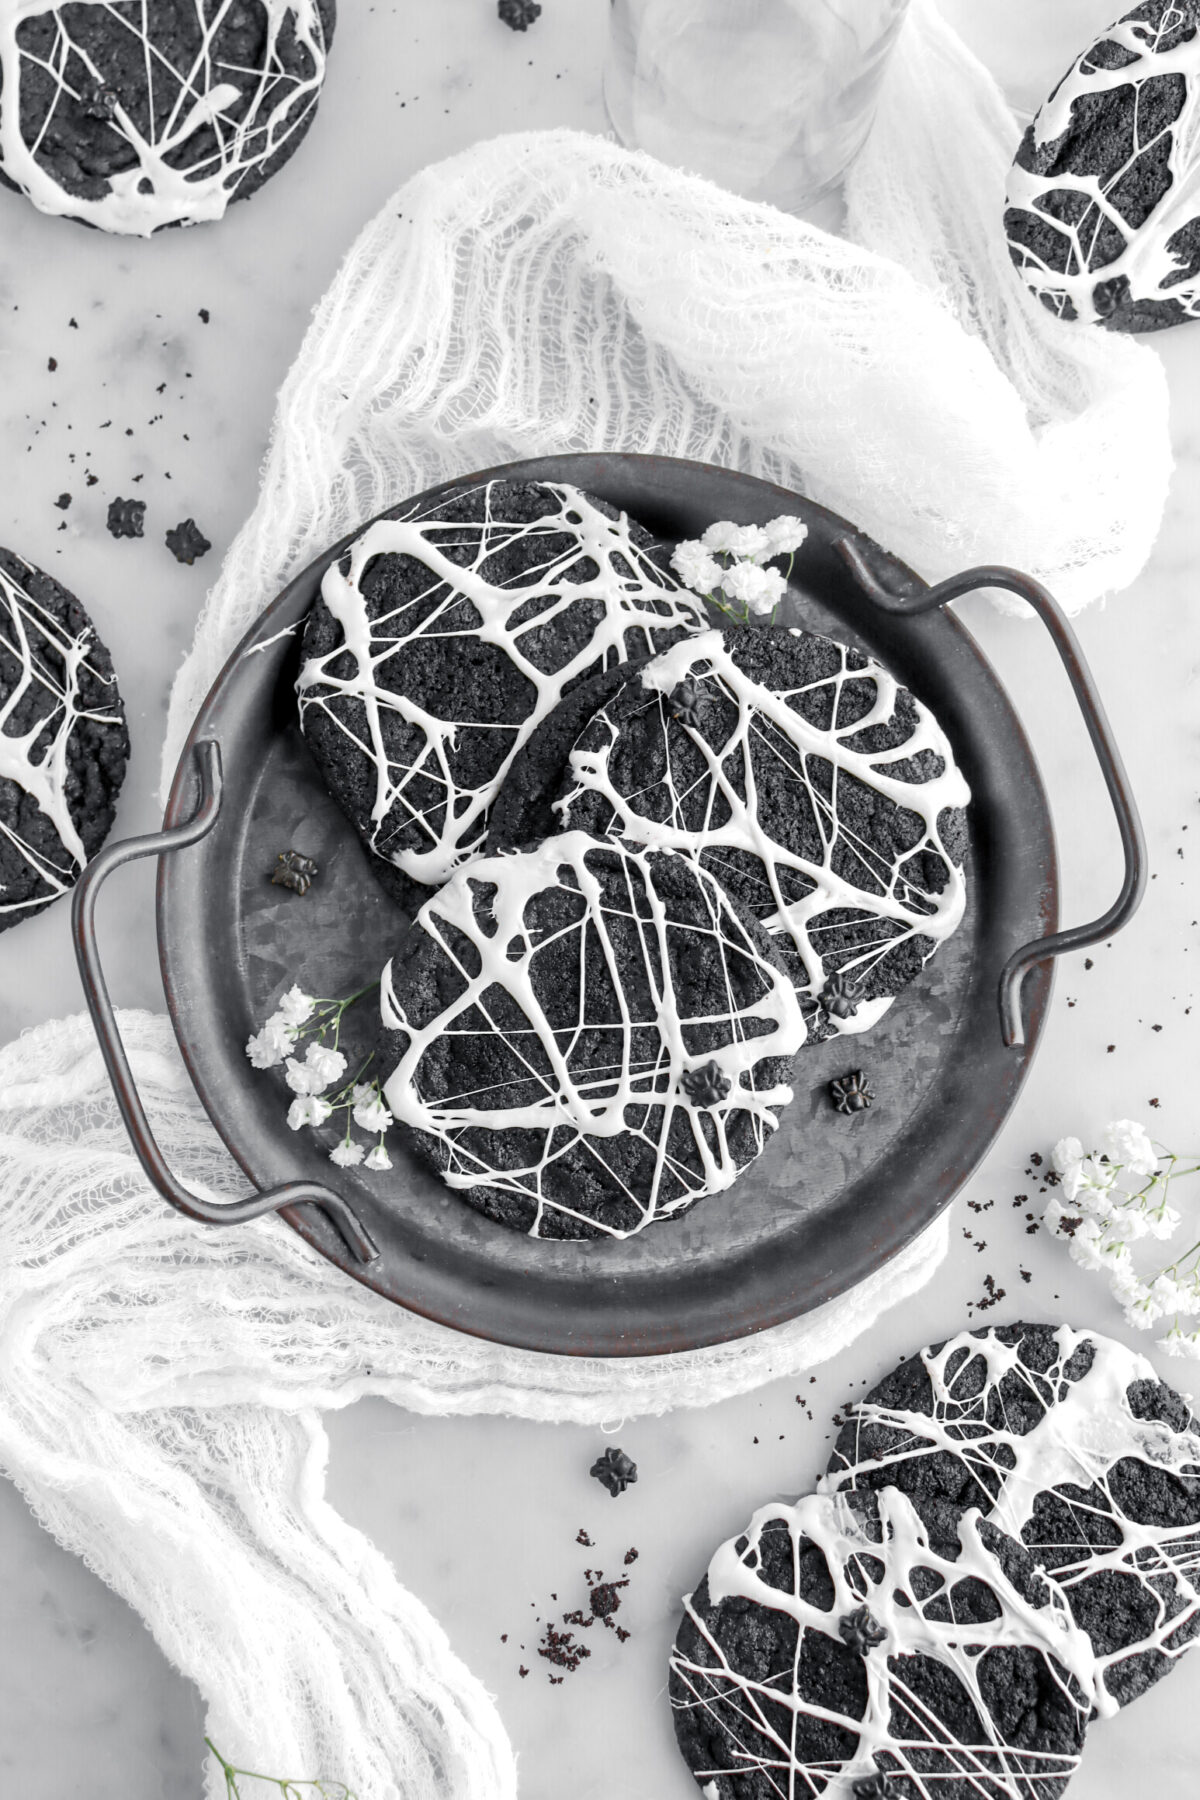
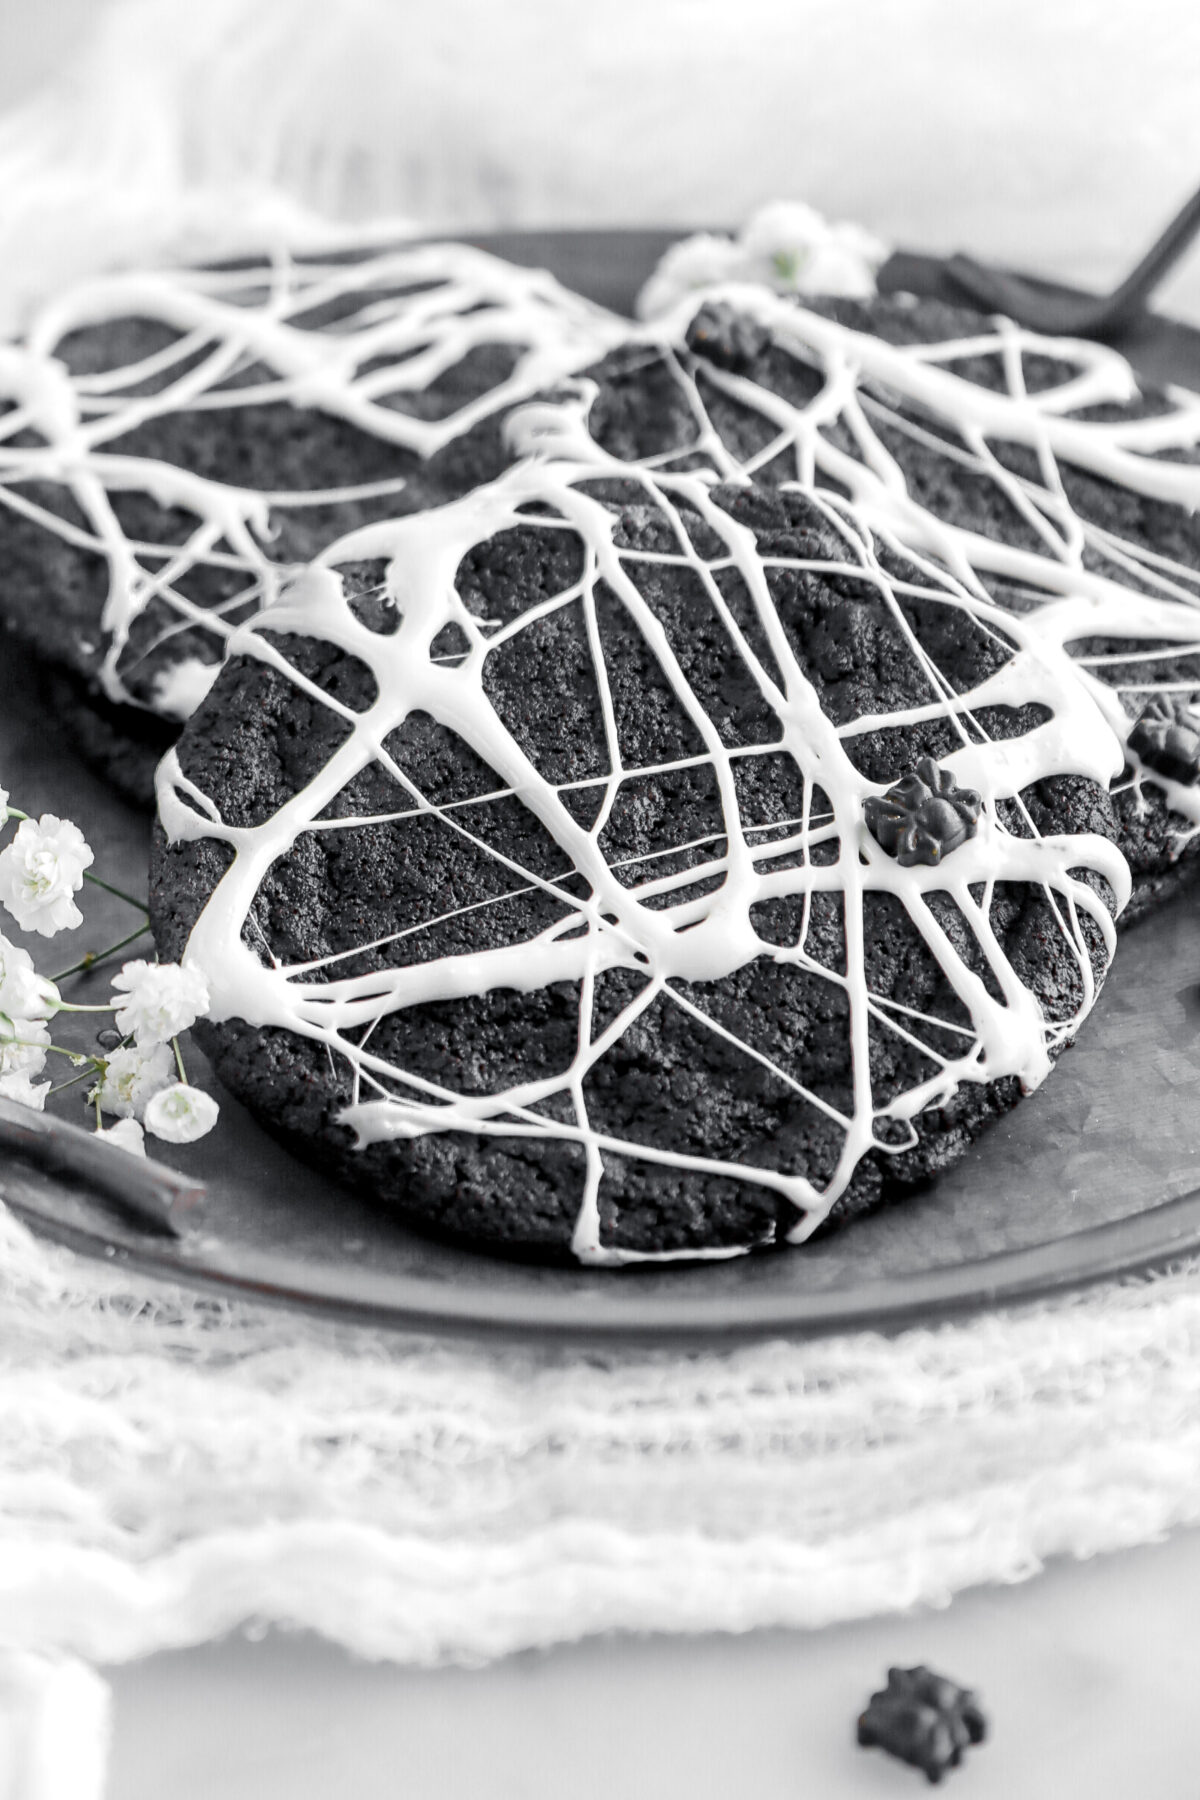
No tricks, only treats! These Creepy Crawly Spider-Web Cookies are the gravely delicious treat you need to bake this Halloween! Crafted from a soft and chewy brown sugar cookie base, these cookies are naturally flavored and dyed with black cocoa powder, then topped off with melted marshmallow. Every bite is extra chocolatey, oh-so soft and chewy, decadent, yet shockingly easy to make, and so much fun for spooky season.
About The Recipe
Is it really spooky season if you haven’t baked a batch of terrifyingly delicious cookies? That’s at least what my mom and I usually say! I mean, let’s be honest, what’s Halloween without a few extra sweet treats?
And let me tell you, these cookies…oh man.

My mom and I had this idea last year, but felt we were a little too far into the spooky season to share them. So, we wrote the idea down and told ourselves to share it early enough that everyone could enjoy these cookies!
Which, is what brings us to today. Originally, we were going to share these cookies on Friday (because it’ll be Friday the 13th!!), but I have a bit of a special post planned for that day, so we moved these back to today.
And, between you and me, I’m super excited to be sharing these cookies today.
Not only are they perfectly spooky, they are seriously delicious as well as shockingly easy to make!
All you need is a few bowls, a whisk, and a sheet pan to make them. I mean, could it GET any easier?!
Plus, who doesn’t love the combo of chocolate and marshmallow? Especially when it’s something THIS easy to mix up! Oh, and there’s no food dye in this recipe. It’s a total win-win!
And it’s just a fun recipe to make. A little messy because of the melted marshmallow, I’ll admit it, but fun nonetheless. I mean, getting marshmallow everywhere is pretty much half the fun!
What Makes These The BEST Spider Web Cookies
- Requires minimal effort to make, and you don’t need any specialty tools or equipment (bye-bye electric mixer!).
- Can be made ahead of time to make party planning quick and easy.
- Uses black cocoa powder to naturally color and flavor these cookies!
- The perfect bake to make with friends and family.
- Uses melted butter and brown sugar to give you the chewiest, softest, most delicious cookie.
- Chocolate + marshmallow…what could be better?!
Equipment Needed
- Mixing Bowls
- Whisk
- Rubber Spatula
- Sheet Pans
- Large Cookie Scoop
Ingredients
Full ingredient amounts and instructions can be found in the recipe card at the bottom of the post.
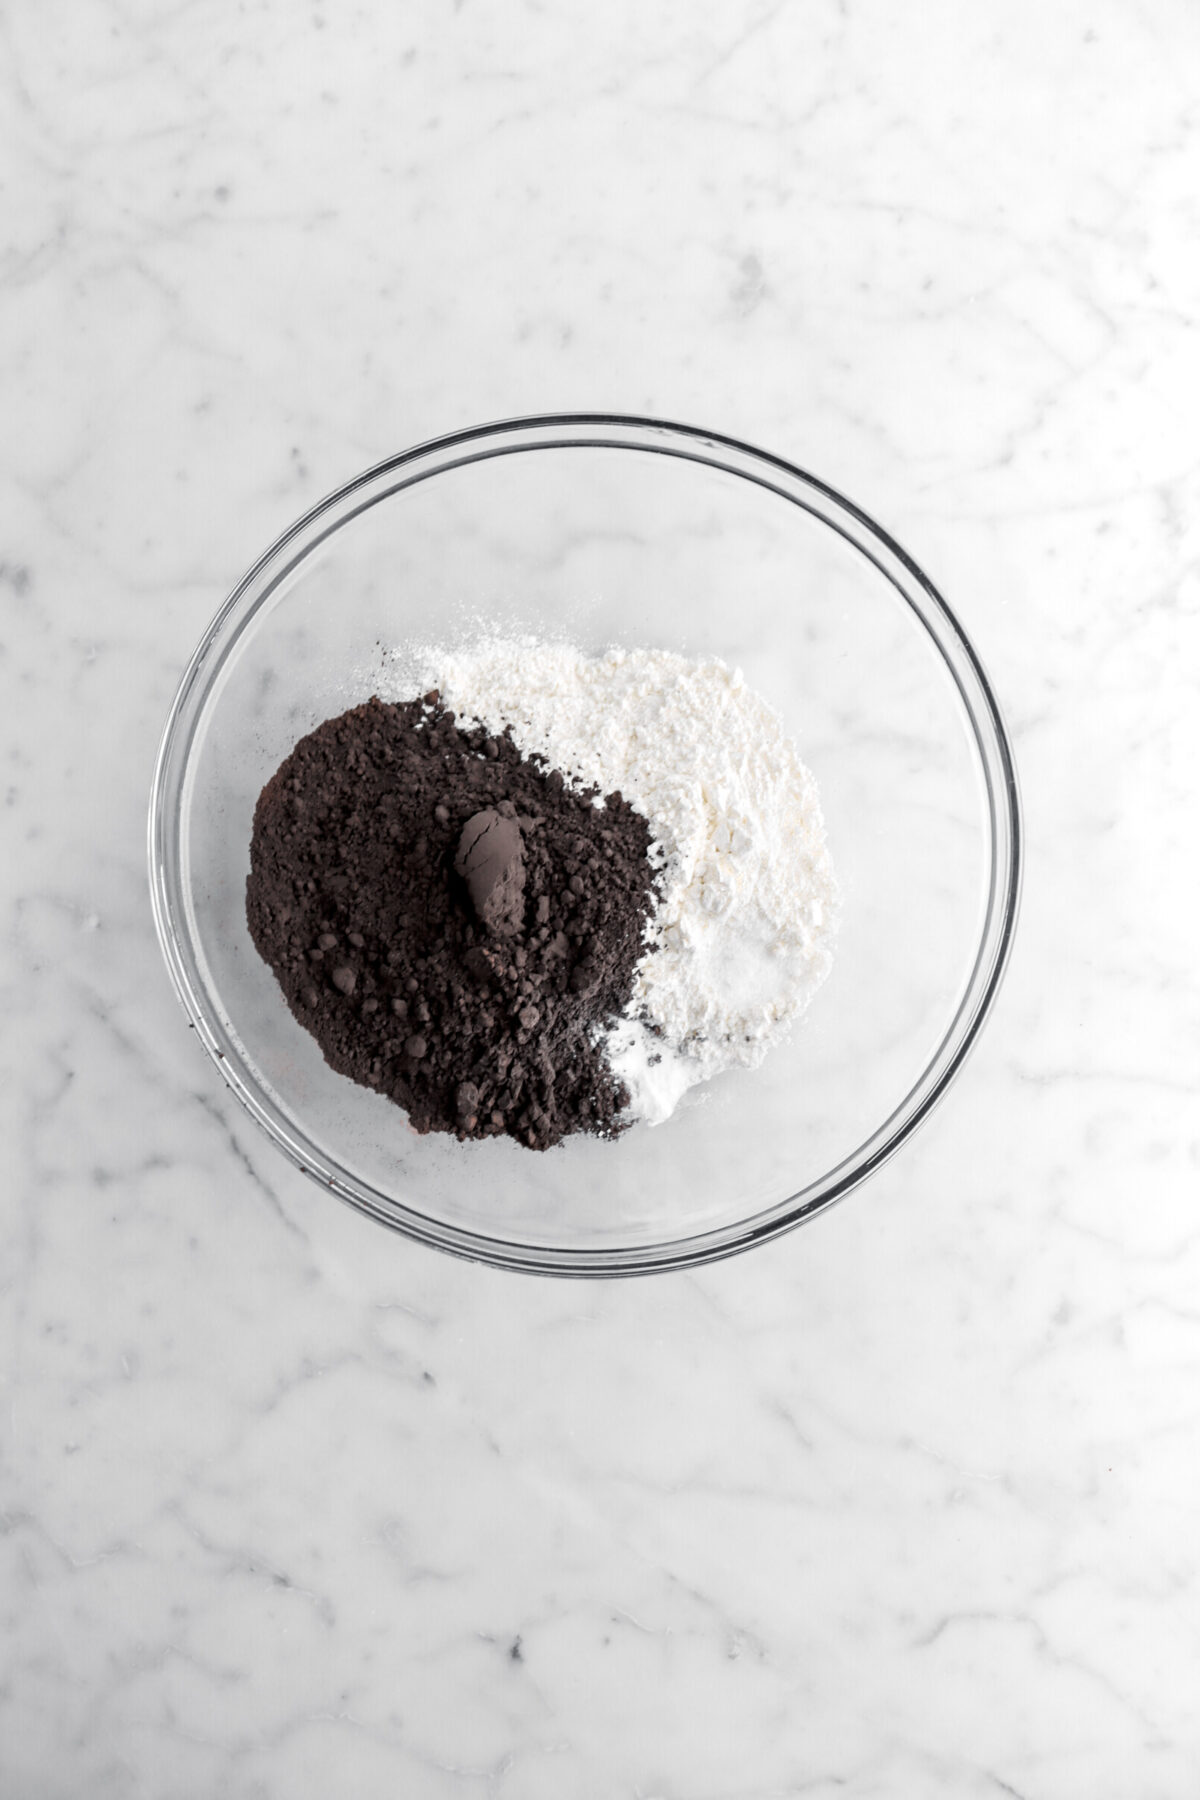
- All-Purpose Flour – has just the right amount of protein to strengthen the cookie dough and give it the perfect structure.
- Black Cocoa Powder – naturally adds color to these cookies, while also providing an intense chocolate flavor!
- Baking Soda – provides just the right amount of rise and also promotes spread and chewiness!
- Salt – enhances the flavor.
- Unsalted Butter – Melting the butter makes these cookies oh-so soft and chewy.
- Granulated Sugar – adds sweetness and creates a crunchier edge.
- Brown Sugar – keeps these cookies chewy while also adding a delicious undertone of flavor.
- Large Eggs -act as a binder and help to make the cookies tender.
- Vanilla Extract – enhances the chocolate flavor.
- Mini Marshmallows – make adding the spider-web design fun and easy.

How To Make Spider-Web Cookies (Step-by-Step!)
Step 1: Prepare dough
In a large bowl, whisk together flour, cocoa, baking soda, and salt. Set aside.

In a medium bowl, whisk together butter and sugars.


Pour over dry ingredients. Mix until combined.


Step 2: Bake
Use a 1 1/2 Tablespoon scoop to portion dough onto prepared pans. Bake for 10 minutes, or until done.


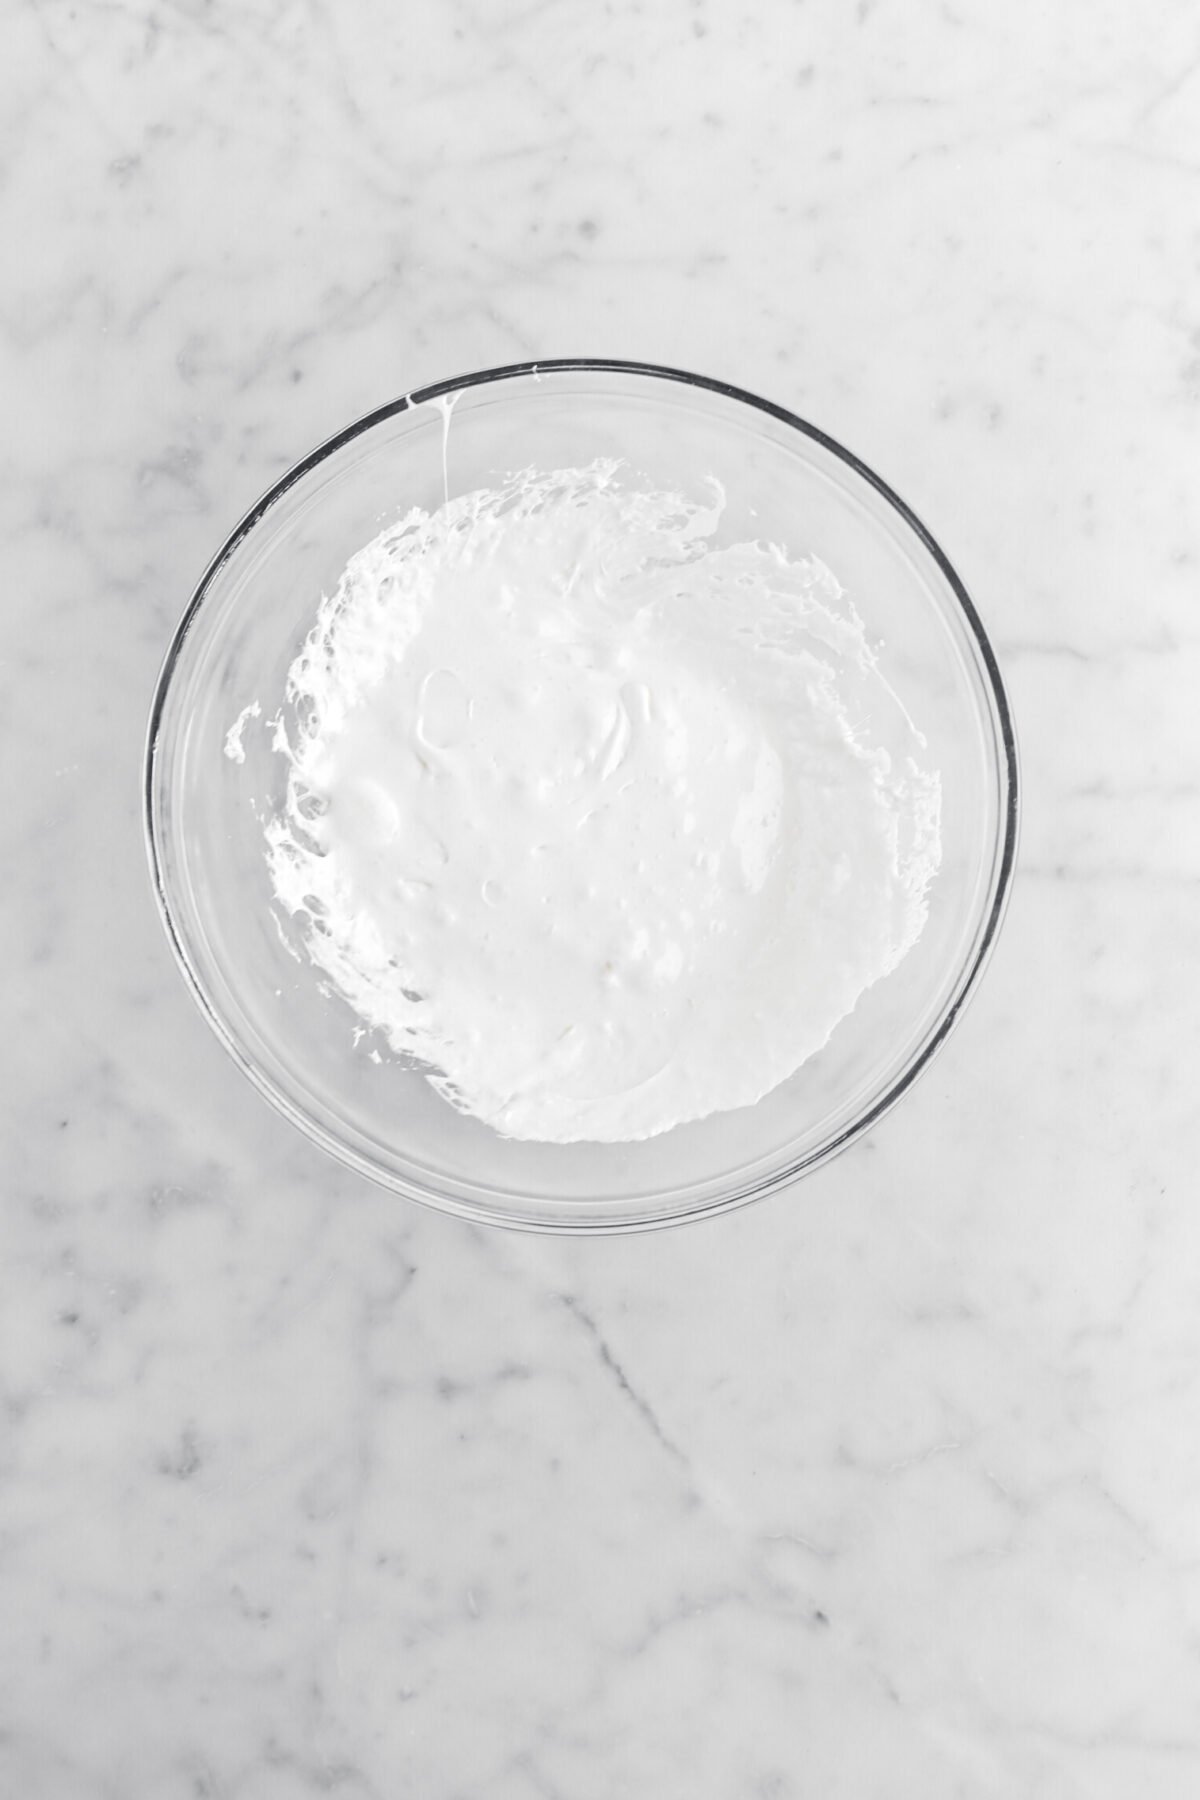
Step 3: Melt marshmallows
Place marshmallows in microwave safe bowl. Heat in 15 second increments, stirring after each, until melted and smooth.

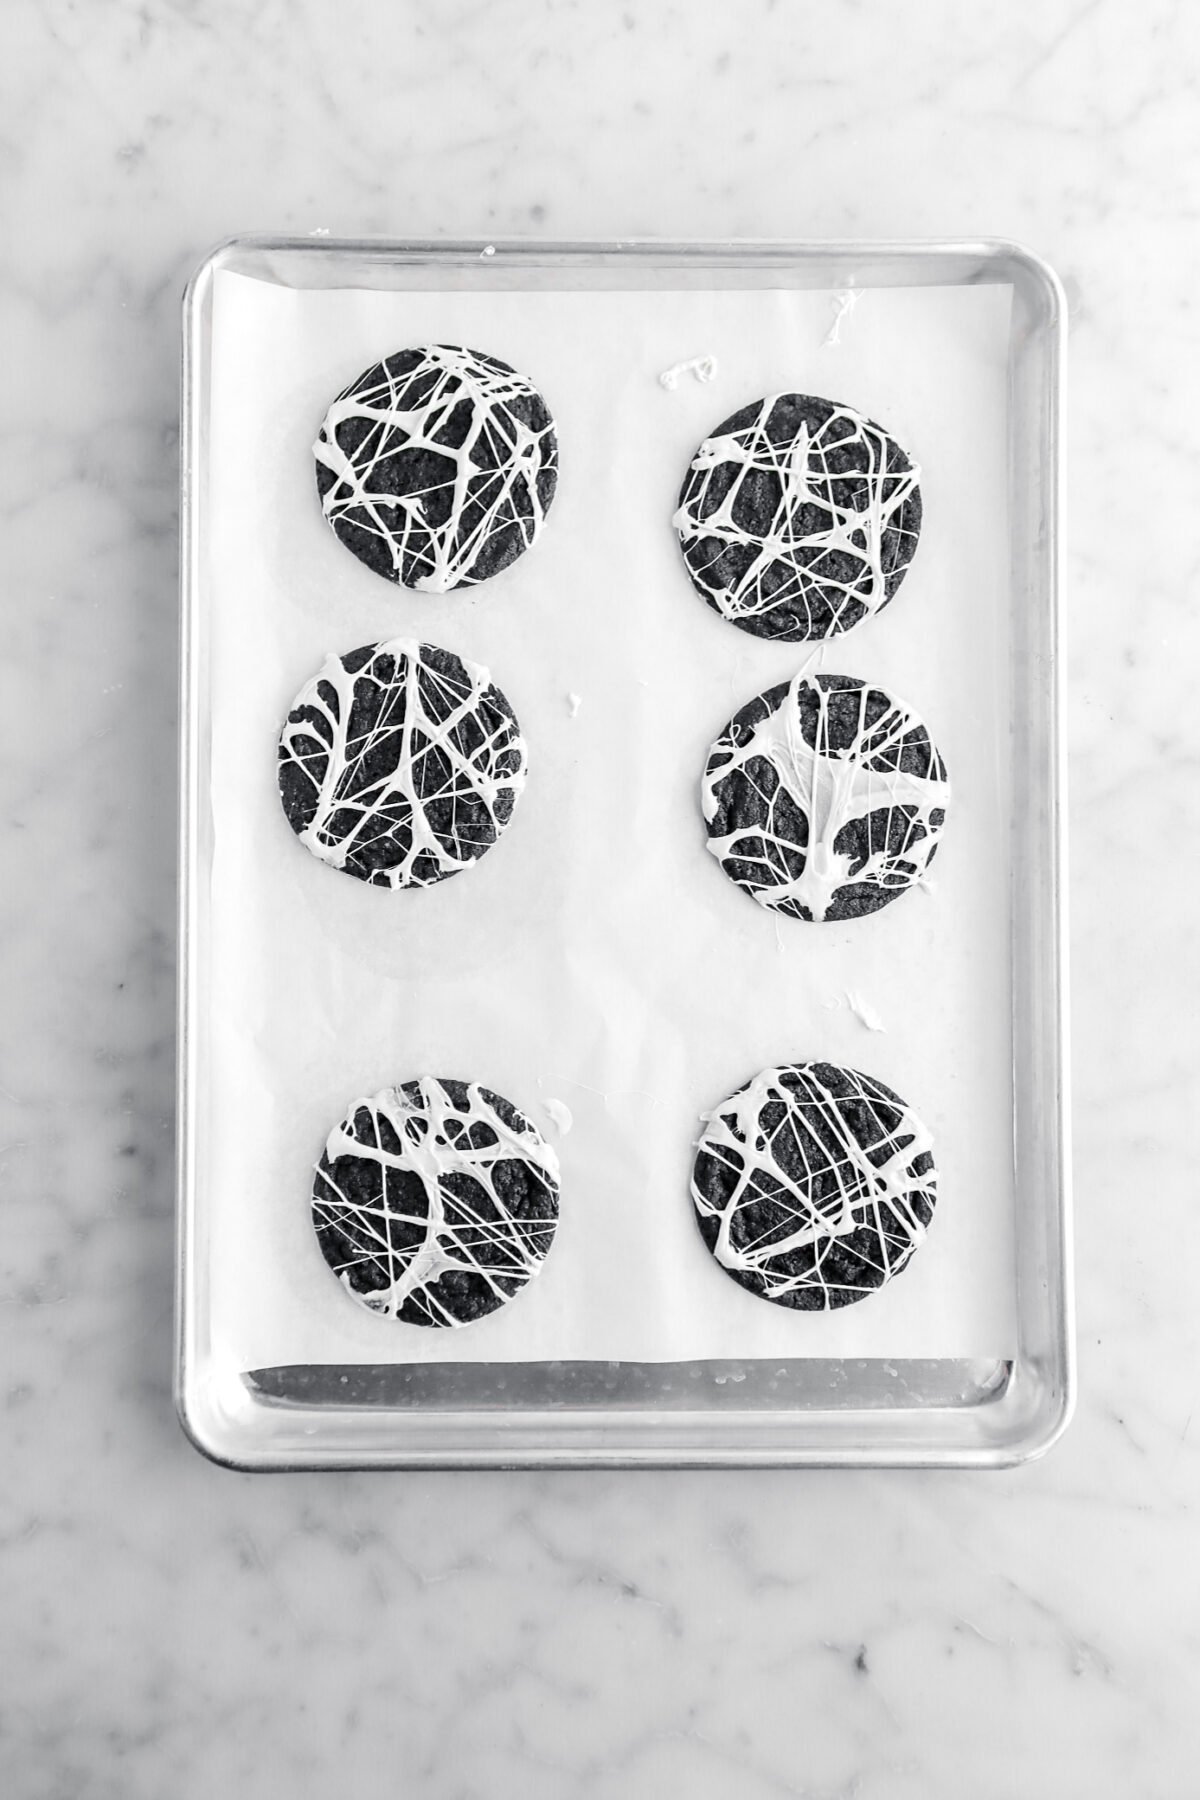
Step 4: Decorate
Scoop out desired amount of marshmallow. Pull it into a web-like pattern. Place on cookie.
FAQ’s and Troubleshooting
This is either because the cookie dough was improperly mixed or the dry ingredients were lumpy. Cocoa powder is nearly always lumpy, so it’s best to sift it.
Once the cookies are baked, they should be thin and look a little crinkly. This usually takes about 10 minutes.
If the cookies didn’t spread while baking, this is due to too much flour being added to the cookie dough. Be sure to measure carefully!
Either the cookies were over-baked or the flour was over-measured. Both of these can cause your cookies can cause your cookies to be dry.
Of course! Once the cookie dough is mixed, you can portion the dough and place it on a lined sheet pan, then freeze until hardened. Once the cookie dough balls are frozen solid, you can place in a freezer safe zip-top bag and freeze for up to 3 months.
How To Get a Perfectly Round Cookie
The best way to achieve this is to use a cookie scoop so the dough balls will already be rounded. As they bake, the cookies will spread into a perfect round shape!
Sometimes the cookies can get a little wonky-shaped while spreading, but no worries! You can still fix it.
Using a round cookie cutter that’s larger than the cookie, bump the cookies while they’re still very hot to fit inside the cutter and circle around them to create the perfect round shape!
How To Store
IMO, these cookies are so good there won’t be any left over! Although if you do have any leftover, these cookies can be stored in an airtight container or zip-top bag and kept in the fridge for 5 – 7 days. If desired, you can also freeze them in a freezer safe bag for up to 3 months!
You can also make these cookies all the way to step 7, then freeze the cookie dough on a lined sheet pan! Once the cookie dough is completely frozen, place them in a zip top bag and keep in the freezer for up to 3 months. When you are ready to bake, take out the desired number of cookies and proceed with the baking instructions. You will have to adjust the cook time by adding a couple of extra minutes.
Looking for more recipes like this? Here are a few you may like:

Expert Tips
- Remember to sift your cocoa powder.
- Be careful to not over-mix the cookie dough! Just stir the flour mixture in until there are no more pockets of flour.
- It’s best to use light colored sheet pans for these cookies.
- Don’t forget to line your baking sheet.
- It’s best to use a cookie scoop to ensure all cookies are the same size.
- The cookie dough can be frozen and baked at a later date.
- Do not over bake these cookies! When in-doubt, take them out. These cookies are best when they are just barely baked. This provides the perfect soft and chewy texture.
- Place the marshmallow onto the cookies after they’ve completely cooled.
- If the melted marshmallow gets too difficult to work with/starts to get too cold, place it back in the microwave for 15-30 seconds or until warmed through.
When you make these Creepy Crawly Spider-Web Cookies, leave a comment down below and/or give this recipe a rating! We love hearing from you and answering any questions you might have! Also, be sure to tag us on social media and hashtag it #BakersTable.

Creepy Crawly Spider-Web Cookies
Ingredients
- 1½ cups all purpose flour*
- ½ cup black cocoa powder, sifted
- ½ teaspoon baking soda
- ½ teaspoon salt
- 1 cup unsalted butter, melted
- ⅔ cup granulated sugar
- ¾ cup brown sugar, firmly packed
- 1 large egg, room temperature
- 1 large egg yolk, room temperature
- ¾ teaspoon vanilla extract
- 2 cups mini marshmallows, melted
Instructions
Cookies
-
Heat oven to 350℉.
-
Line 2 sheet pans with parchment paper. Set aside.
-
In a large bowl, whisk together flour, cocoa, baking soda, and salt. Set aside.
-
In a medium bowl, whisk together butter, sugars, egg, egg yolk, and vanilla.
-
Pour over dry ingredients.
-
Mix until combined.
-
Use a 1 ½ Tablespoon scoop to portion dough onto prepared pans.
-
Bake for 10 minutes, or until done.
Topping
-
Place marshmallows in microwave safe bowl.
-
Heat in 15 second increments, stirring after each, until melted and smooth.
-
Scoop out desired amount of marshmallow.
-
Pull it into a web-like pattern.
-
Place on cookie.
Notes + Tips!
- Remember to sift your cocoa powder.
- Be careful to not over-mix the cookie dough! Just stir the flour in until there are no more pockets of flour.
- It’s best to use light colored sheet pans for these cookies.
- Don’t forget to line your baking sheet.
- It’s best to use a cookie scoop to ensure all cookies are the same size.
- The cookie dough can be frozen and baked at a later date.
- Do not over bake these cookies! When in-doubt, take them out. These cookies are best when they are just barely baked. This provides the perfect soft and chewy texture.
- Place the marshmallow onto the cookies after they’ve completely cooled.
- If the melted marshmallow gets too difficult to work with/starts to get too cold, place it back in the microwave for 15-30 seconds or until warmed through.
Tools You May Need (affiliate links)
Nutrition
Nutritional information is only an estimate. The accuracy of the nutritional information for any recipe on this site is not guaranteed.
– Still Hungry? –
Here are a few recipes may like!